Category Archives: wsjt-x

Compiling WSJT-X for armbian

This small tutorial will show you how to build and install wsjt-x for your ARMBIAN. In my case I have an OrangePI PC board and armbian buster desktop. But this tuto should work for any other board. It should also work for any other Linux and architecture. E.g.: raspios, debian, ubuntu, etc.

I followed this tutorial for Linux Mint:

http://kb4lhp.blogspot.com/2018/12/recipe-for-building-and-installing-new.html

Lets start by installing some requirements:

sudo apt-get install build-essential checkinstall texinfo gfortran libfftw3-dev qt5-default qttools5-dev qttools5-dev-tools libqt5svg5-dev qtmultimedia5-dev asciidoctor libqt5serialport5-dev libqt5multimedia5 docbook-xsl xsltproc libxml2-utils dpkg cmake libusb-dev libusb-1.0 libudev-dev

Then download the latest tgz from https://physics.princeton.edu/pulsar/K1JT/wsjtx.html ex;

wget https://physics.princeton.edu/pulsar/K1JT/wsjtx-2.2.2.tgz 

Lets extract the contents of this package and cd into the directory:

tar zxf wsjtx-2.2.2.tgz
cd wsjtx-2.2.2

And then, lets configure and build wsjtx:

cmake -DWSJT_SKIP_MANPAGES=ON -DWSJT_GENERATE_DOCS=OFF .
cmake --build .

This process will take time depending on how fast is your CPU. After it finished, we will invoke the next command in order for it to build the .deb package. Pay attention you will have to modify option number 10:

sudo checkinstall

This package will be built according to these values: 

0 -  Maintainer: [ [email protected] ]
1 -  Summary: [ WSJT-X version 2.2.2 compiled by HC6PE ]
2 -  Name:    [ wsjtx ]
3 -  Version: [ 2.2.2 ]
4 -  Release: [ 1 ]
5 -  License: [ GPL ]
6 -  Group:   [ checkinstall ]
7 -  Architecture: [ armhf ]
8 -  Source location: [ wsjtx-2.2.2 ]
9 -  Alternate source location: [  ]
10 - Requires: [ libqt5multimedia5 ]
11 - Provides: [ wsjtx ]
12 - Conflicts: [  ]
13 - Replaces: [  ]
Enter a number to change any of them or press ENTER to continue: 

in here you enter “10” and add “libqt5multimedia5” (without the quotes). Then just continue and it will build the .deb:


Done. The new package has been installed and saved to
/home/radio/wsjtx-2.2.2/wsjtx_2.2.2-1_armhf.deb

Lets install it!

radio@pisdr:~$ sudo dpkg -i ~/wsjtx-2.2.2/wsjtx_2.2.2-1_armhf.deb
(Reading database … 112570 files and directories currently installed.)
Preparing to unpack …/wsjtx_2.2.2-1_armhf.deb …
Unpacking wsjtx (2.2.2-1) over (2.2.2-1) …
Setting up wsjtx (2.2.2-1) …
Processing triggers for man-db (2.7.5-1) …

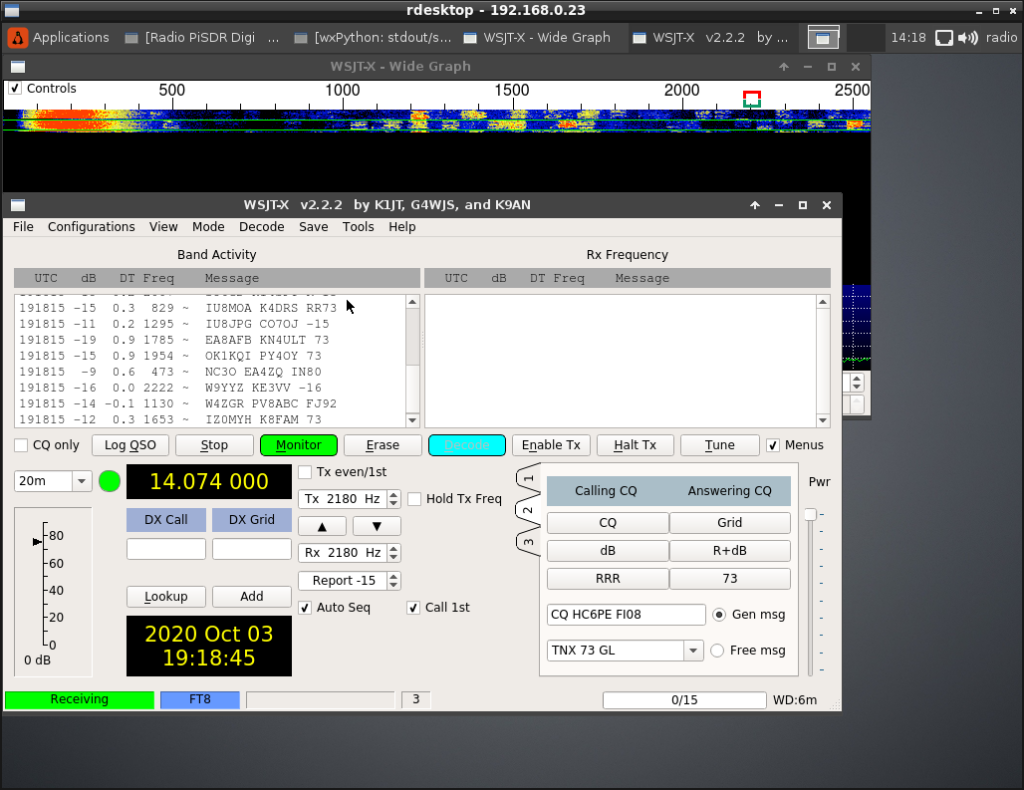
And… it works! Check the version, in my case it is 2.2.2, the same I compiled and installed.
How to upload to e-qsl from Linux shell

So, for example: you are using WSJT-X and would like to automatically upload your new contacts from your Linux to EQSL.

WSJT-X store its logs in ~/.local/share/WSJT-X/wsjtx_log.adi

I have created a small script to check if wsjtx_log.adi has been modified, extract the last 2 QSO from the file to a temporary file and upload that file to eQSL, here is how:

git clone https://github.com/hc6pe/adifupload.git
cd adifupload
chmod +x adifupload.sh

Edif adifupload.sh and change ADIFILE, EQSLUSER and EQSLPASS to suit your needs:

vi ~/adifupload/adifupload.sh
....
#Where is your .adi file located? 
#Specify the full path (change YOURUSERNAME):
ADIFILE="/home/YOURUSERNAME/.local/share/WSJT-X/wsjtx_log.adi"
#your eQSL username. Use CAPS altough I think
# lowercase will work as well
EQSLUSER="N0CALL"
#your EQSL password.
EQSLPASS="not-my-pass"
...

And add a crontab task to start adifupload.sh on every reboot (change YOURUSERNAME to your user’s home dir):

crontab -e
@reboot /home/YOURUSERNAME/adifupload/adifupload.sh

Now, the script will start on your next reboot. And keep started checking if your ADIFILE has changed, if it notice it has changed, then it will upload the last 2 lines of the files (just in case it missed the previous upload).

Of course, if you have “massaged” the logfile, for example updating some QSO info (date, time, band, etc), this script will not upload the changed QSOs unless it is one of the last 2 lines.

So I suggest, from time to time, to do a full upload of your adif file by signing into eQSL.cc and do a manual upload. This way you may catch any missing to upload QSO.

My experience with JT-65/JT-9 modes

Well, I’ve been using JT65 and JT9 modes (I will reffer them as JT65 from now on) for more than 3 years now and I would like to share some experiences on using these modes in order to help fellow hams to join them.

The main points to take care in order to work JT65 are:

  • A very accurate time.
  • An adecuate audio input to the program. Too much audio will overload the audio card and distort the results. Too little audio will avoid the audio card to detect the signals.
  • A rig capable of being activated via VOX or via CAT.

I currently own two rigs capable of work JT65:

  • A Kenwood TS430S and
  • A Flex-1500 (5w QRP) on steroids with a HardRock 50 power amp.

Regarding the TS-430s I connect the rig by using a tigertronics USB, this is a USB sound card that connects to the audio input and output of my transceiver and my computer. The computer sees it as a USB sound card and microphone. The TS430s gets activated via PTT when my tigertronics USB gets some signal injected from my program to its microphone.

By using my kenwood ts430s I can not use CAT, so I can not change frequencies, oh also I can not work in split mode, it means my rig is tuned to a single frequency and I must manually change it whenever I change bands. By not being able to work split, I can not work JT9 at the same time I work JT65 (JT9 is +2khz above the JT65 frequency).

As you can see, the kenwood rig is quite old, and even with the inconveniences I have stated before I can work and I have worked tons of stations in JT65/JT9 (and of course CW, PSK31, etc).

Regarding my Flex-1500:

It is a SDR radio I bought 5 years ago, when I re-started in radio. It is a 5W QRP transceiver I can control from my computer. It is, I can change bands from the program (PowerSDR) and tune AGC, powerlevels, filters, etc from it.

It has several “BUTs”:

  1. It has not an internal ATU, so changing bands has to be manually done in order to use an external tunner.
  2. It has only 5watts. I really love QRP but from time to time love to use some extra “punch”.
  3. A powerfull PC capable of processing the signals from my SDR radio. SDR is not for weak proccessor PCs… you actually need quite a powerfull one, if possible core2duo and UP.

I solved issues 1 and 2 by building a HardRock-50 with the ATU kit. It took me, I don’t know, maybe 6 hours to finish building with the help of my daughter (she loves picking resistors, and holding the PCB and so on).

I connected the HR-50 and the flex-1500 via a serial port cable and now my flex-1500 “informs” the HR-50 when PTT is pushed. The band changes are being issued from the WSJT-x program via a program called DDUtil to the HR-50 and to the Flex-1500.

This is because CAT was conceived a 2 ways communication. It is: when I change bands from my WSJT-x program, it only communicates to a single CAT device. However I need to inform two: my power amp and my flex-1500 radio. DDUtil helps you with this. It acts as a CAT device, receives the band change command, and replicate that command to my two devices (flex-1500 and hr-50).

This way I can change bands and keep myself busy in 20m and 10m usually.

Oh, yes, BTW, I operate my shack somehow remotedly. Instead of standing in front of my shack 24×7, I installed a VNC server to my shack PC and I can control it from my laptop anywhere Im at home: bed, dinner table, watching a baseball game, etc.

Here is a video of a QSO with a fellow ham in France.

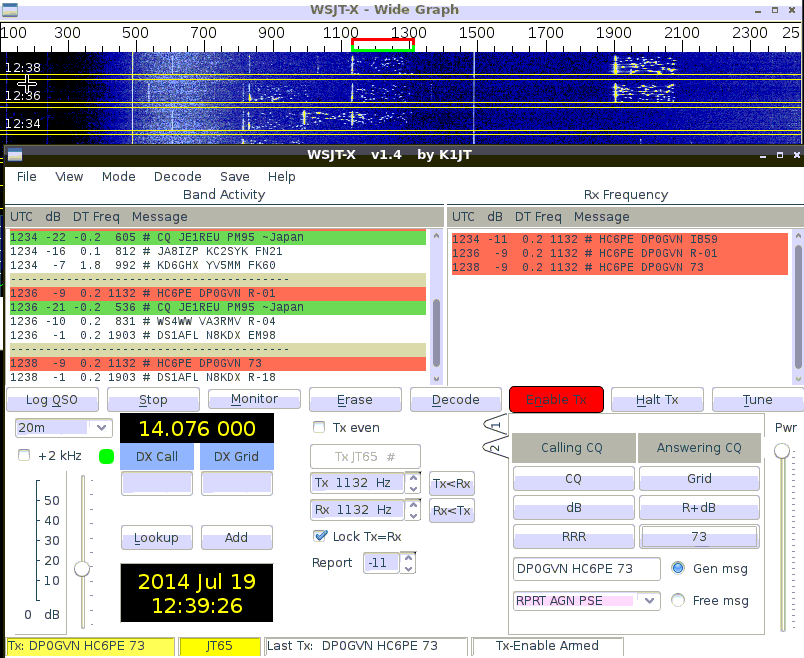
DP0GVN – Antártida Alemana

Bueno, no todos los días se habla con la antártida. Hoy me levanté y me conecté a la PC de la radio via VNC, habían unos cuantos japoneses a la vista, uno que otro americano. Pero casi todo apuntaba al oeste. Demasiada limpia la banda.

En fin, llamé CQ un par de veces y de repente me llama un indicativo con un prefijo que no había trabajado antes. DP0GVN. Hum , es alemán, qué raro si europa no se estaba oyendo ahora.

Bueno, le respondí y me fui a qrz.com a ver quién era. Y apareció esto:

Selection_079

Al momento opera el comandante de la base Neumayer que es radioaficionado.

Vaya, no es que sea la última estación del planeta (aunque sí un poco aislada), pero es agradable contactar con la antártida. Creo que hablé hace un tiempo con un ruso o un americano que estaba en la antártida, debo revisar.

dp0gvn-antartica-1

Compiling and installing wsjt-x for Fedora-20 and Fedora-21

Hi, this tutorial is my first step to create an rpm package for wsjt-x for Fedora.

I started trying to understand the somehow cryptic instructions written here:

http://www.physics.princeton.edu/pulsar/K1JT/wsjtx-doc/wsjt-dev-guide.html

In fact it has a small problem: when you try to svn using berlios, it fails.

I guess somehow the script is old and the code no longer resides in berlios.

The other small issue is that the instructions in that document are for debian-like distros. I guess they actually like ubuntu and/or debian and Fedora looks unstable for them. It is their right to use any other Linux distro.. and ours to use Fedora.

For me, and for several others, Fedora has been running very very well for years (I’ve been using it since Fedora-9) so with little effort we can “port” the instructions to Fedora and enjoy wsjt-x in such a wonderful distro.

Im running Fedora-20 now, but I guess this instructions will work for Fedora-18, Fedora-19 and the future Fedoras.

and yes, I will try to create an rpm package for easier distribution.. later. as of now, you can follow the instructions in this page:

Instructions

This was the hardest part: To discover the needed packages for compiling wsjt-x. I had to go over the compile process once and again until I was able to discover the needed packages for fedora. You will install these ones:

yum install hamlib hamlib-devel cmake qt5-qtbase qt5-qtbase-devel subversion \
qt5-qtmultimedia qt5-qtmultimedia-devel gcc-gfortran gcc-c++ ftw fftw-devel glibc.i686 gcc-libgfortran.i686 libgfortran.i686

why glibc.i686 and gcc-libgfortran.i686? Well, almost everybody runs 64-bits Linux in these ages, but there is some proprietary program called kvasd that wsjtx needs. And kvasd is compiled for 32-bits arch as of now.

The other packages are needed for wsjtx to run, and the *-devel are needed for it to compile.

If you notice Im missing some other packages, it is because I compiled in a non-clean system, I mean, I ran it in a system I used to work from time to time so some packages could have been installed previously.. so let me know if you notice Im missing some packages to be installed.

Downloading the source code

this is easy, we use svn to download the code onto some dir:

cd
mkdir wsjt-env
cd wsjt-env
svn co svn://svn.code.sf.net/p/wsjt/wsjt/branches/wsjtx
export BUILD_DIR=~/wsjt-env/wsjtx
cd wsjtx
export rev_num=`egrep “Rev:” mainwindow.cpp |awk ‘{print $4}’`

We first went to our $HOME dir. Then created wsjt-env and cd to wsjt-env.

Then we downloaded, using svn, the latest source code.

We exported the variable BUILD_DIR to match the directory where the source code was downloaded.

Finally we moved to wsjtx and stored in rev_num the current revision number. (I had to change the way we obtain the revision number from the original script).

Compiling

Compiling is easy as well.. if all packages are already installed, then you should simply follow these steps:

cd lib
make -f Makefile.linux
cd ..
export QT_SELECT=qt5
qmake-qt5
j_c=$(grep -c ^processor /proc/cpuinfo)
make -j$j_c

If you had some errors, it means we are missing to install some packages.. let me know.

If everything went ok… let “install” wsjtx:

Installing wsjtx

cd ..
mv ./wsjtx-$rev_num ./wsjtx-$rev_num-$(date +%F-%H%M) &> /dev/null
mv ./wsjtx_install ./wsjtx-$rev_num
cd ./wsjtx-$rev_num
cp ../wsjtx/*.dat ../wsjtx/*.txt ./
# you can download cty.dat directly from country-files.com
# rm -f cty.dat
# wget http://www.country-files.com/cty/cty.dat
cp -R ../wsjtx/Palettes/ ../wsjtx/samples/ ./
rm ./CMake*
rm -rf ../wsjtx

And we are done.. we can start wsjtx by doing this:

./wsjtx

donw forget to remember where this binary is located so you can start it later:

pwd