
I have been running RS-HFIQ under raspbian and also under ubuntu Linux on a Raspberry Pi3 and currently under Raspberry Pi4. This is a very raw explanation on how to make it work RS-HFIQ under linux so I can use it as a guide in case I found myself having to reinstall it.
Here is my current Hardware:
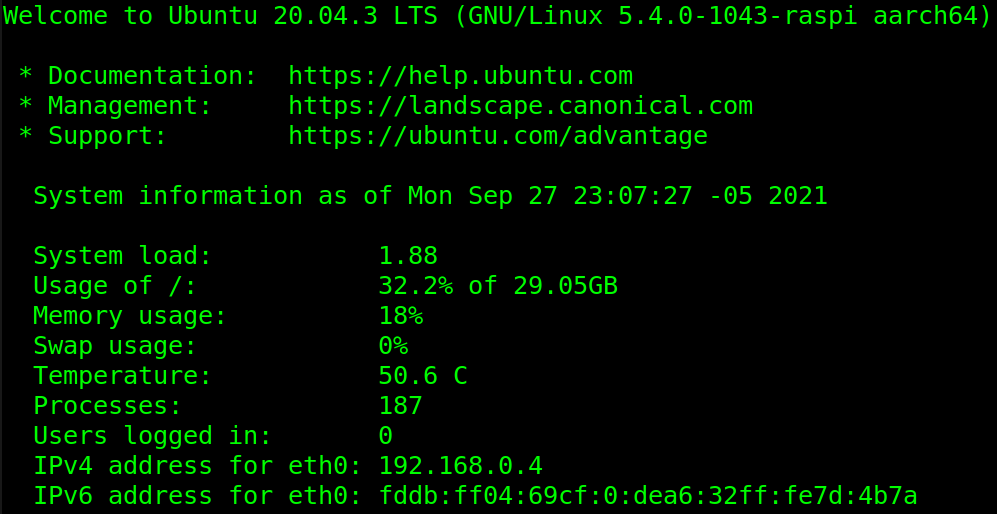
As you can see I’m running it in Ubuntu 20.04 LTS on a 4GB RAM RPI 64bits (aarch64). But I have also ran it under raspbian 32bits (for raspi 3) as well as under Fedora Linux
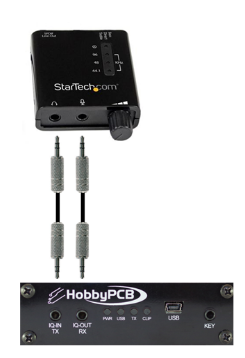
The Input and output is being made via a StarTech USB sound card (recommended by the author of RS-HFIQ). Exactly like this one https://www.startech.com/en-us/cards-adapters/icusbaudio2d
The winning hand here is to be able to install quisk as well as wsjt-x and make them both work together.
How I connected the RS-HFIQ to the USB sound card? Well I followed the diagram in this link: https://sites.google.com/site/rshfiqtransceiver/rs-hfiq-technical-information-site/faq-and-troubleshooting?authuser=0
Here is a picture of how to connect it: IQ OUT RX to MIC, and IQ IN RX to the headphones.
On the raspberry pi4 I installed ubuntu 20.04 LTS from here. You may install the latest DESKTOP version found here. If you install the SERVER it will come up in text mode only, so you will have to install the graphical packages. If you are unexperienced, you better install the DESKTOP version.
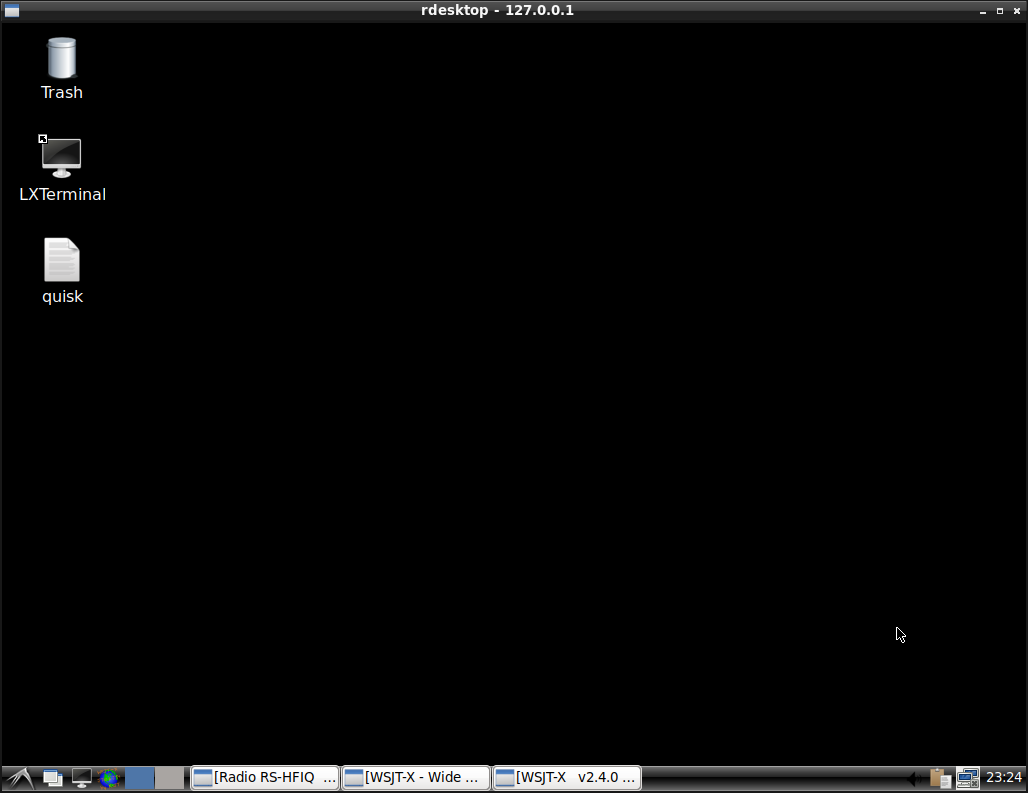
Of course you will notice there are several tasks already running (WSJT-X and QUISK). We will work on that, later,
I then proceed to install quisk, from the quisk website itself: https://james.ahlstrom.name/quisk/
I simply readed the whole page, and then proceeded to install quisk. https://james.ahlstrom.name/quisk/docs.html#Installation (look for the python3 install method in Linux, not the python2).
I’m pretty sure there was some package missing in the instructions but it was quite simple to find out and install it. Sorry, I can’t recall right now.
I tried then to start quisk by typing “quisk” in the linux terminal. It started, now you must configure it
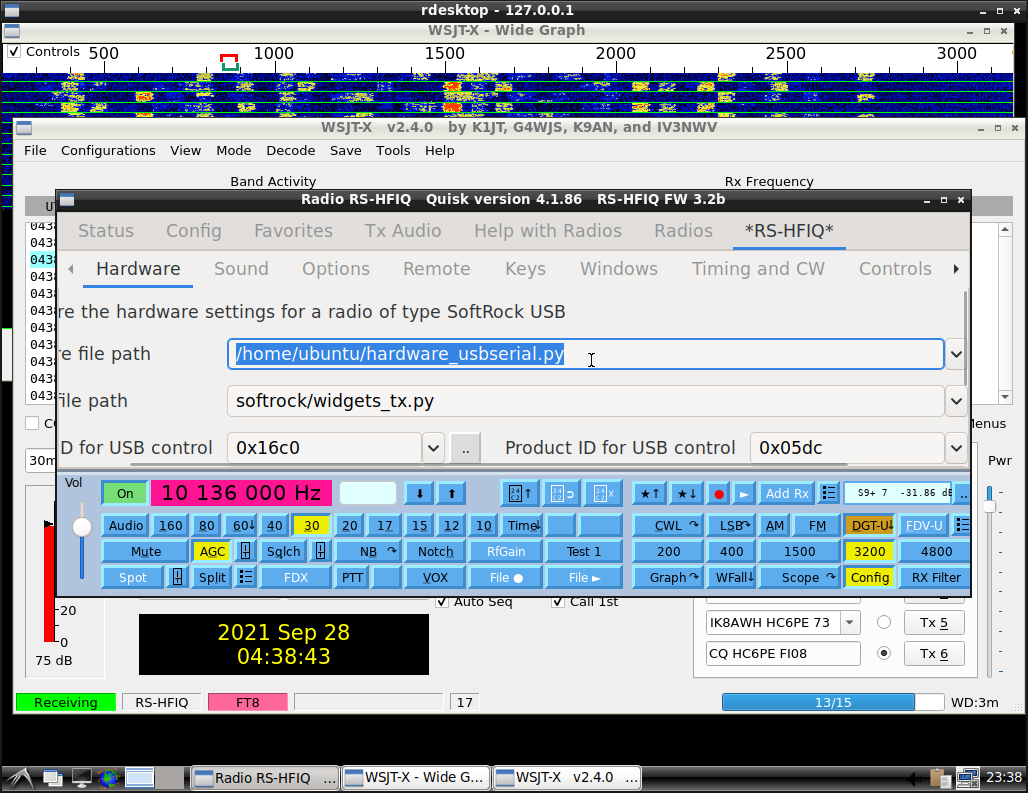
- Click on “Radios” TAB, then chose to add name the new radio and name it, for example: RS-HFIQ”
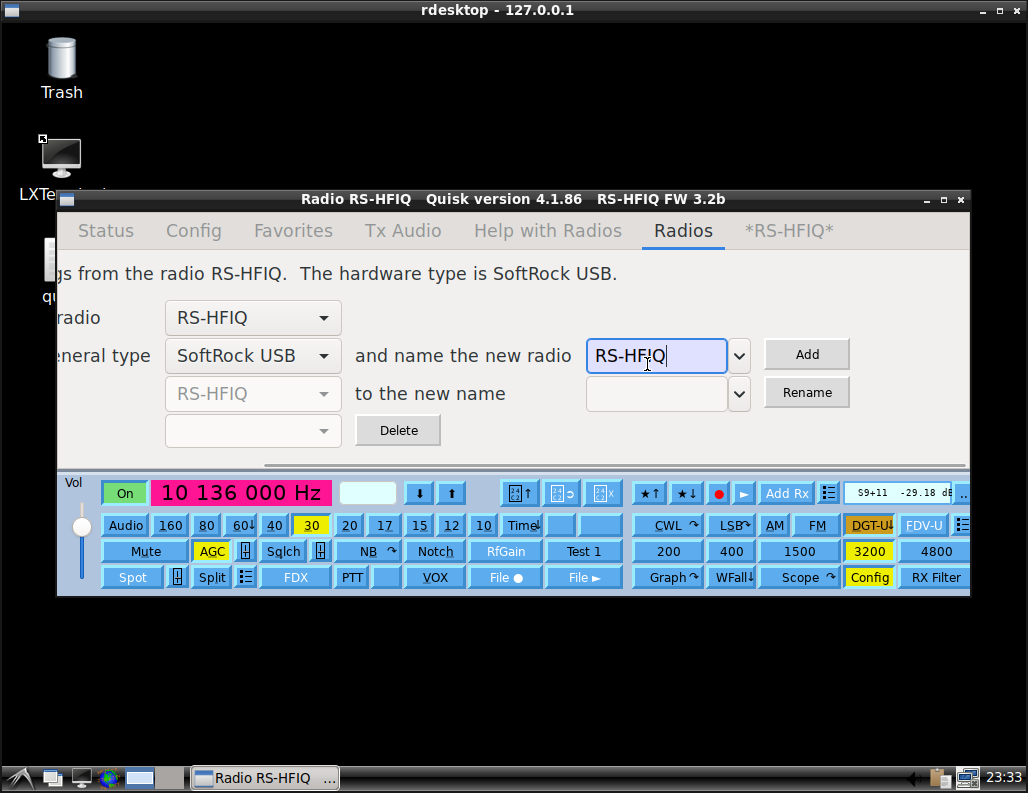
A new TAB with the chosen name will appear to the Right (See the TAB *RS-HFIQ* in my case. Ok, click that TAB.
Now download hardware_usbserial.py from here https://github.com/dl1ksv/rshfiq take note of where you downloaded it. In my case I simply downloaded to /home/ubuntu/ as my username is “ubuntu”. So the full path is /home/ubuntu/hardware_usbserial.py
Adapt, change the option “Hardware file path” under *RS-HFIQ* TAB to fit the place where you downloaded the file, in my case /home/ubuntu/hardware_usbserial.py
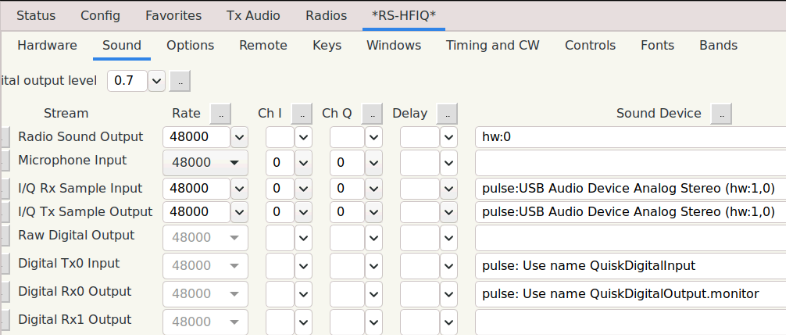
Now click on the “Sound” TAB and try to match exactly the options shown in the following image. Notice that, maybe the alsa hw:X,0 may change, in my case it is hw:2,0 but in your case X may be, for example, 1 (hw:1,0).
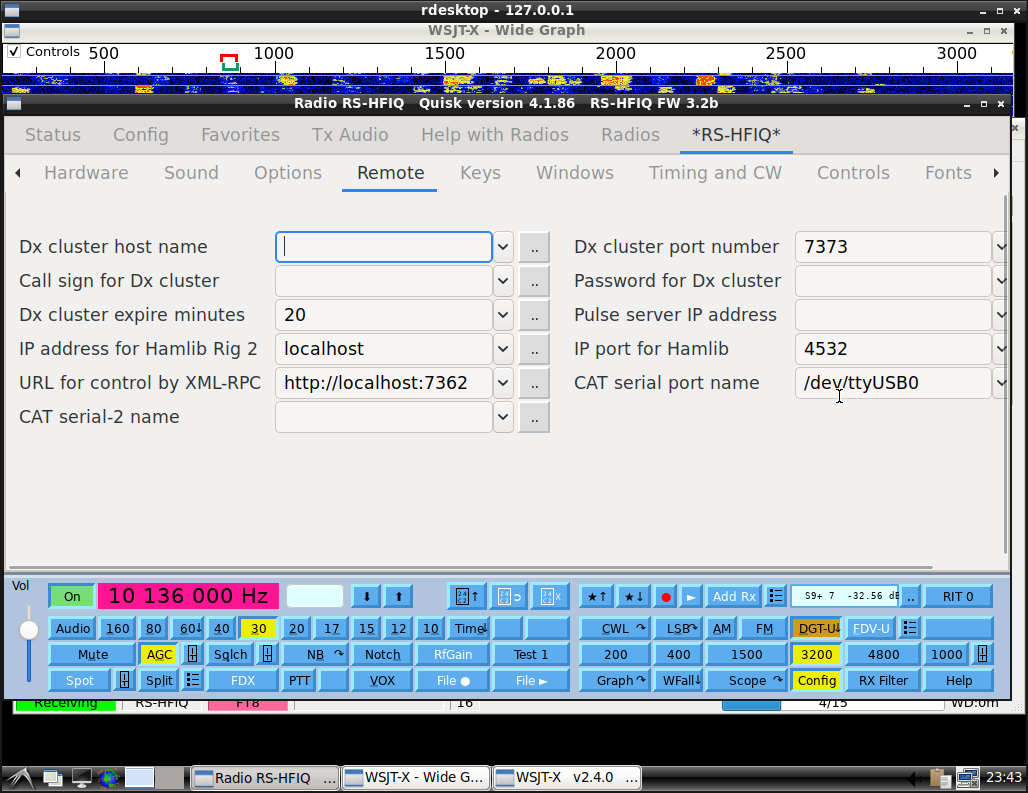
Under remote, match the “Remote” TAB options to the ones shown in the following screen capture:
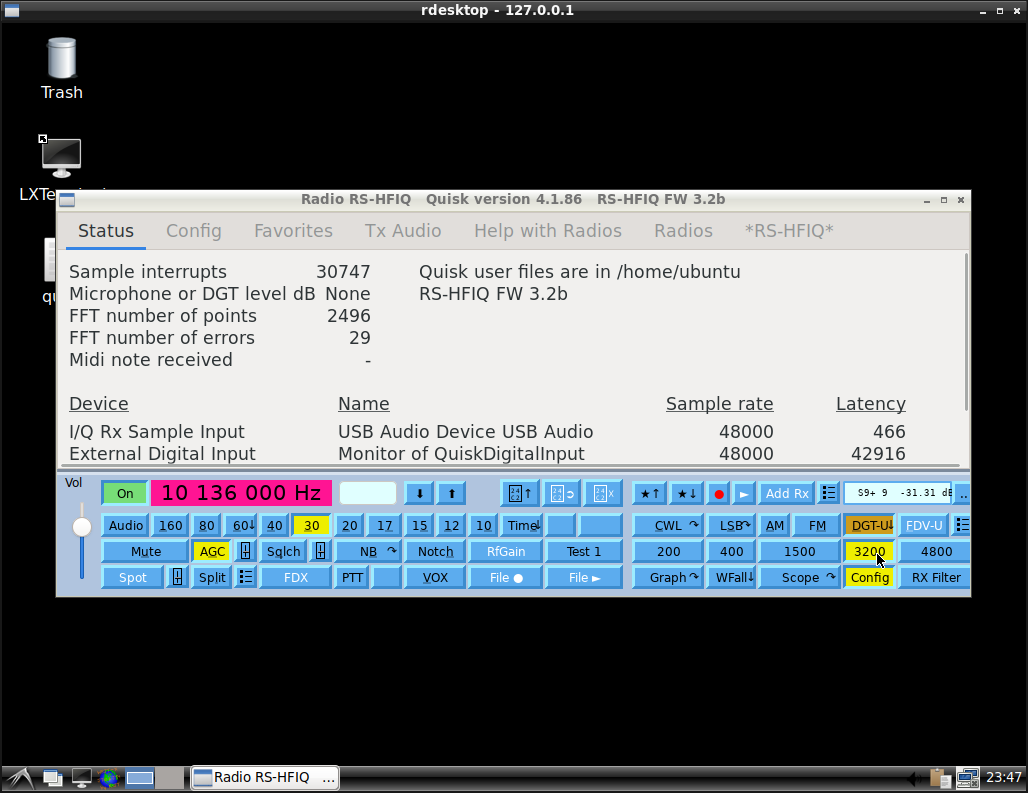
I did not recall having changed anything else. Just clicked the buttons to configure the mode to DGT-USB, the BW to 3200 and the start option to “Config” in the main window. Oh, and AGC as I can see now.
One important thing to mention here: If you notice an error (in red characters) saying “Stream error: pulse Monitor of QuiskDigitalInput”, that usually means that quisk was started before the QuiskDigitalInput virtual sound card was created. Simply close Quisk and open it again.
Here you will notice the red messages:
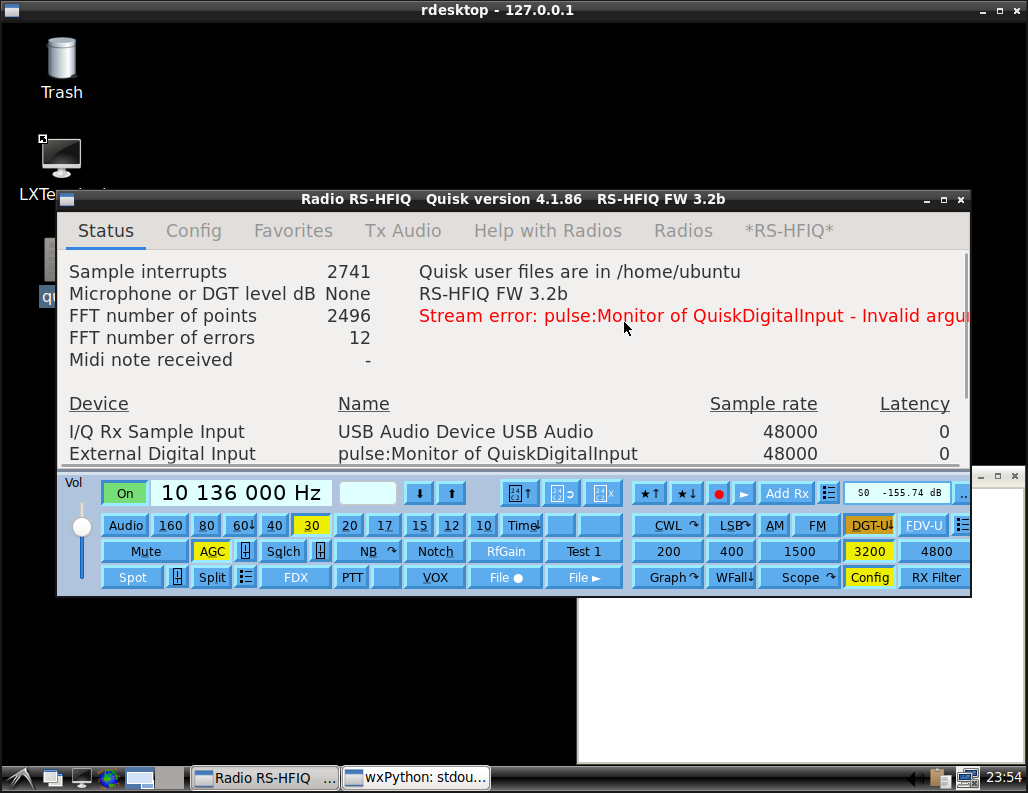
Here is quisk after you close it and reopen it, as you may see, the error message have dissapeared:
I then install wsjt-x:
sudo apt-get update && sudo apt-get install wsjtx
In my case I compiled the latest version (currently 2.4.0) but using the stock version from ubuntu should be ok.
After installing wsjtx, open it and compare/adjust the settings:
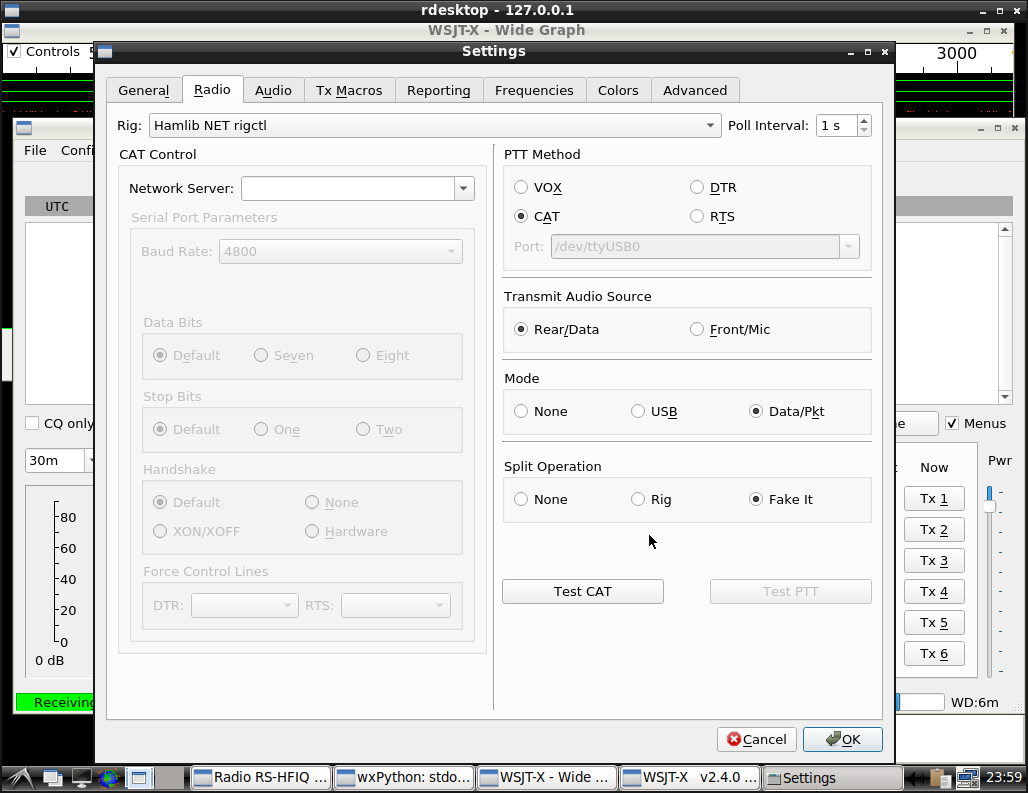
Under radio settings, try to configure it like this:
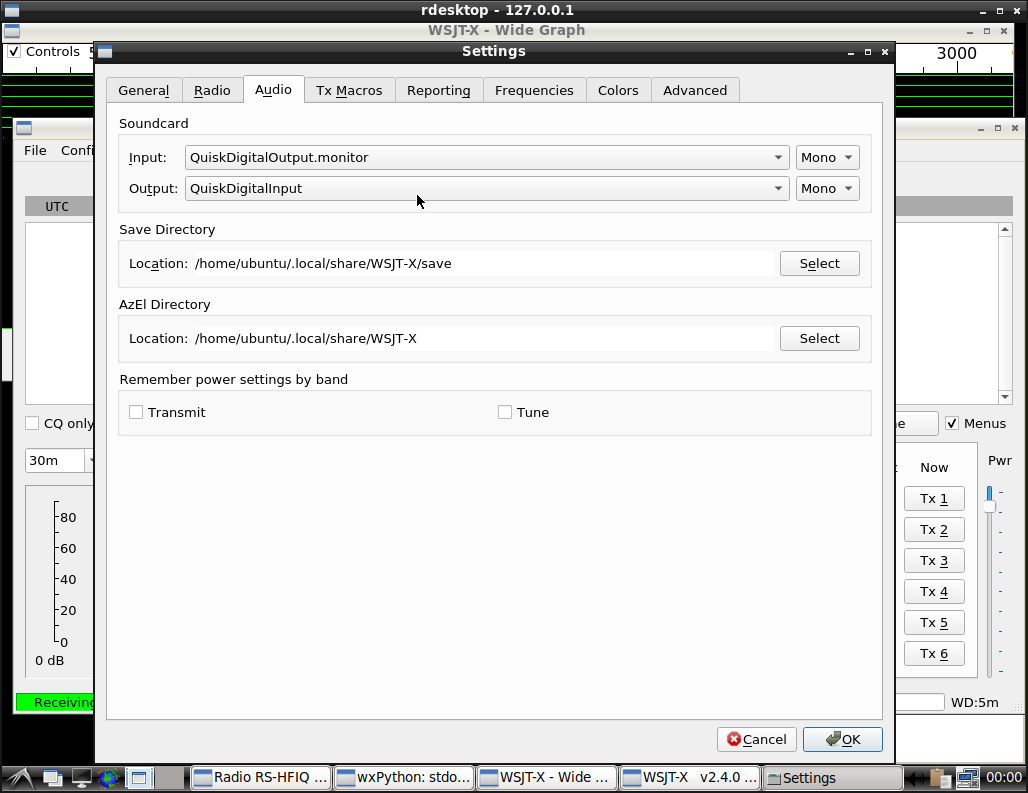
Under “Audio” configure it like this:
The rest of the settings tab is up to you to customize them
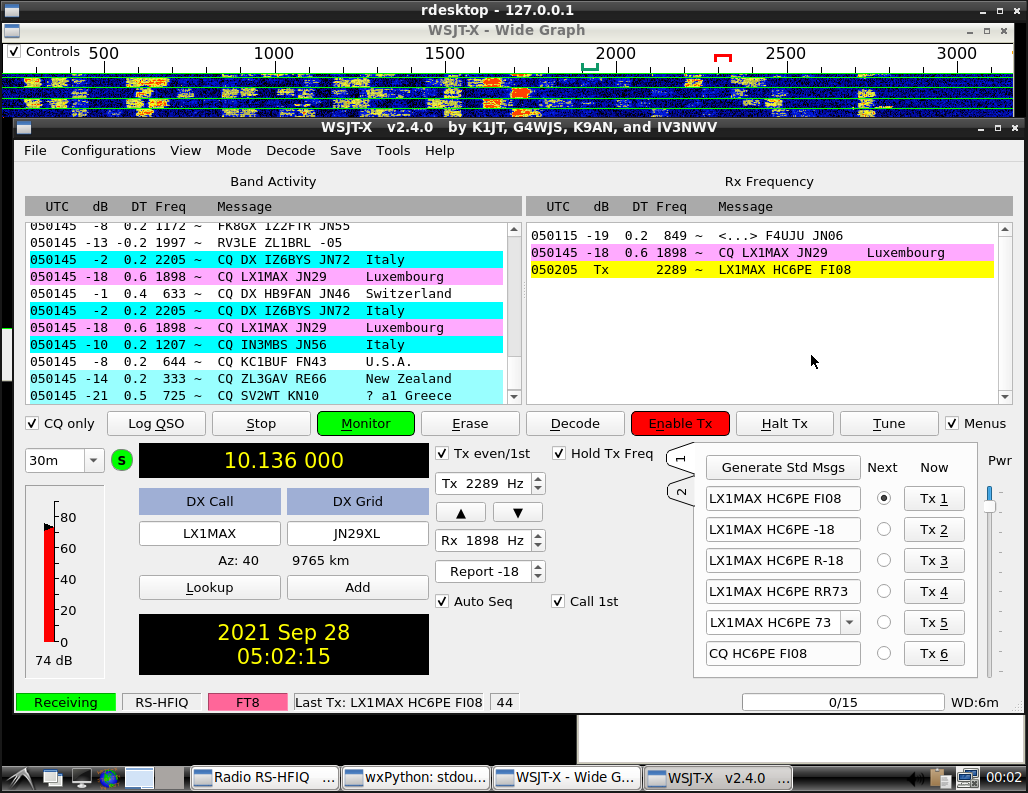
After configuring it, you will be able to change bands, click on tune, receive stations, and also make calls.
I recall there was an issue with earlier versions of RS-HFIQ and a firmware upgrade must be done in order for digimodes to properly work. This issue is outside the scope of this article, just bear in mind that you must be using version 3.2 or newer. In case you have a version <3.2, check the instructions for upgrading here: https://sites.google.com/site/rshfiqtransceiver/rs-hfiq-technical-information-site/arduino-sketch?authuser=0
Not enough power? You will probably want to check the audio output values. I set them to 100% using pulseaudio