- Instalar cupsd
- sudo apt install cups cups-client cups-filters cups-ipp-utils
- Configurar cupsd para que escuche desde 0.0.0.0
- cupsctl –remote-admin –remote-any –share-printers
- Instalar drivers para pixma
- apt -y install hp-ppd hplip
- Acceder a cupsd desde el browser: https://laip:631
- Agregar nueva impresora
- Buscar en la lista de drivers HP y la versión de pixma que tengamos
- buscar lentamente hp laserjet color pro m175a, está desordenado. La m176n me funciona bien, pues no me apareció la m175a
Category Archives: Orange Pi PC
Agregar canon pixma g2100 en debian buster
- Instalar cupsd
- sudo apt install cups cups-client cups-filters cups-ipp-utils
- Configurar cupsd para que escuche desde 0.0.0.0
- cupsctl –remote-admin –remote-any –share-printers
- Instalar drivers para pixma
- sudo apt install printer-driver-gutenprint
- Acceder a cupsd desde el browser: https://laip:631
- Agregar nueva impresora
- Buscar en la lista de drivers CANON y la versión de pixma que tengamos
Compiling WSJT-X for armbian
This small tutorial will show you how to build and install wsjt-x for your ARMBIAN. In my case I have an OrangePI PC board and armbian buster desktop. But this tuto should work for any other board. It should also work for any other Linux and architecture. E.g.: raspios, debian, ubuntu, etc.
I followed this tutorial for Linux Mint:
http://kb4lhp.blogspot.com/2018/12/recipe-for-building-and-installing-new.html
Lets start by installing some requirements:
sudo apt-get install build-essential checkinstall texinfo gfortran libfftw3-dev libboost-log1.74 libboost-log qttools5-dev qttools5-dev-tools libqt5svg5-dev qtmultimedia5-dev asciidoctor libqt5serialport5-dev libqt5multimedia5 docbook-xsl xsltproc libxml2-utils dpkg cmake libusb-dev libusb-1.0 libudev-dev
Then download the latest tgz from https://physics.princeton.edu/pulsar/K1JT/wsjtx.html ex;
wget https://physics.princeton.edu/pulsar/K1JT/wsjtx-2.2.2.tgz
Lets extract the contents of this package and cd into the directory:
tar zxf wsjtx-2.2.2.tgz
cd wsjtx-2.2.2
And then, lets configure and build wsjtx:
cmake -DWSJT_SKIP_MANPAGES=ON -DWSJT_GENERATE_DOCS=OFF .
cmake --build .
This process will take time depending on how fast is your CPU. After it finished, we will invoke the next command in order for it to build the .deb package. Pay attention you will have to modify option number 10:
sudo checkinstall
Don’t create documentation (n)
This package will be built according to these values:
0 -  Maintainer: [ [email protected] ]
1 -  Summary: [ WSJT-X version 2.2.2 compiled by HC6PE ]
2 -  Name:    [ wsjtx ]
3 -  Version: [ 2.2.2 ]
4 -  Release: [ 1 ]
5 -  License: [ GPL ]
6 -  Group:   [ checkinstall ]
7 -  Architecture: [ armhf ]
8 -  Source location: [ wsjtx-2.2.2 ]
9 -  Alternate source location: [  ]
10 - Requires: [ libqt5multimedia5 ]
11 - Provides: [ wsjtx ]
12 - Conflicts: [  ]
13 - Replaces: [  ]
Enter a number to change any of them or press ENTER to continue:
in here you enter “10” and add “libqt5multimedia5” (without the quotes). Then just continue and it will build the .deb.
Exclude any missing file from package.
Done. The new package has been installed and saved to
/home/radio/wsjtx-2.2.2/wsjtx_2.2.2-1_armhf.deb
Lets install it!
radio@pisdr:~$ sudo dpkg -i ~/wsjtx-2.2.2/wsjtx_2.2.2-1_armhf.deb
(Reading database … 112570 files and directories currently installed.)
Preparing to unpack …/wsjtx_2.2.2-1_armhf.deb …
Unpacking wsjtx (2.2.2-1) over (2.2.2-1) …
Setting up wsjtx (2.2.2-1) …
Processing triggers for man-db (2.7.5-1) …
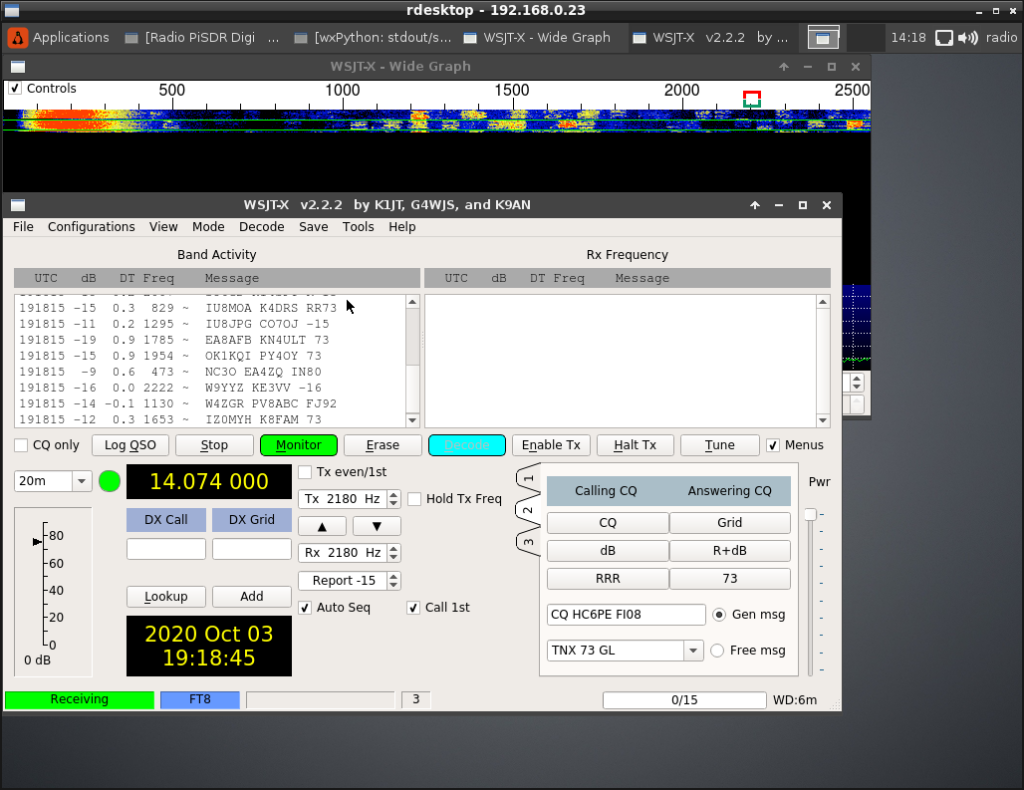
And… it works! Check the version, in my case it is 2.2.2, the same I compiled and installed.

Raspberry y las micro placas que abrieron el mundo al IoT.
En este video, comenzamos una serie sobre raspberry pi, y ARM en general. Donde exploraremos diversas formas de aprovechar estos boards de muy bajo costo e interesantes prestaciones.
