
Category Archives: Raspberry Pi

Habilitar ntp server con GPS en AlmaLinux 10 para raspberry pi

Ya este escenario lo había probado en Raspbian; me dio un poco de trabajo realmente echarlo a andar.

Así que decirí hoy instalar AlmaLinux 10 en mi Raspberry Pi 4 y probar echar a andar mi servicio de NTP con GPS.

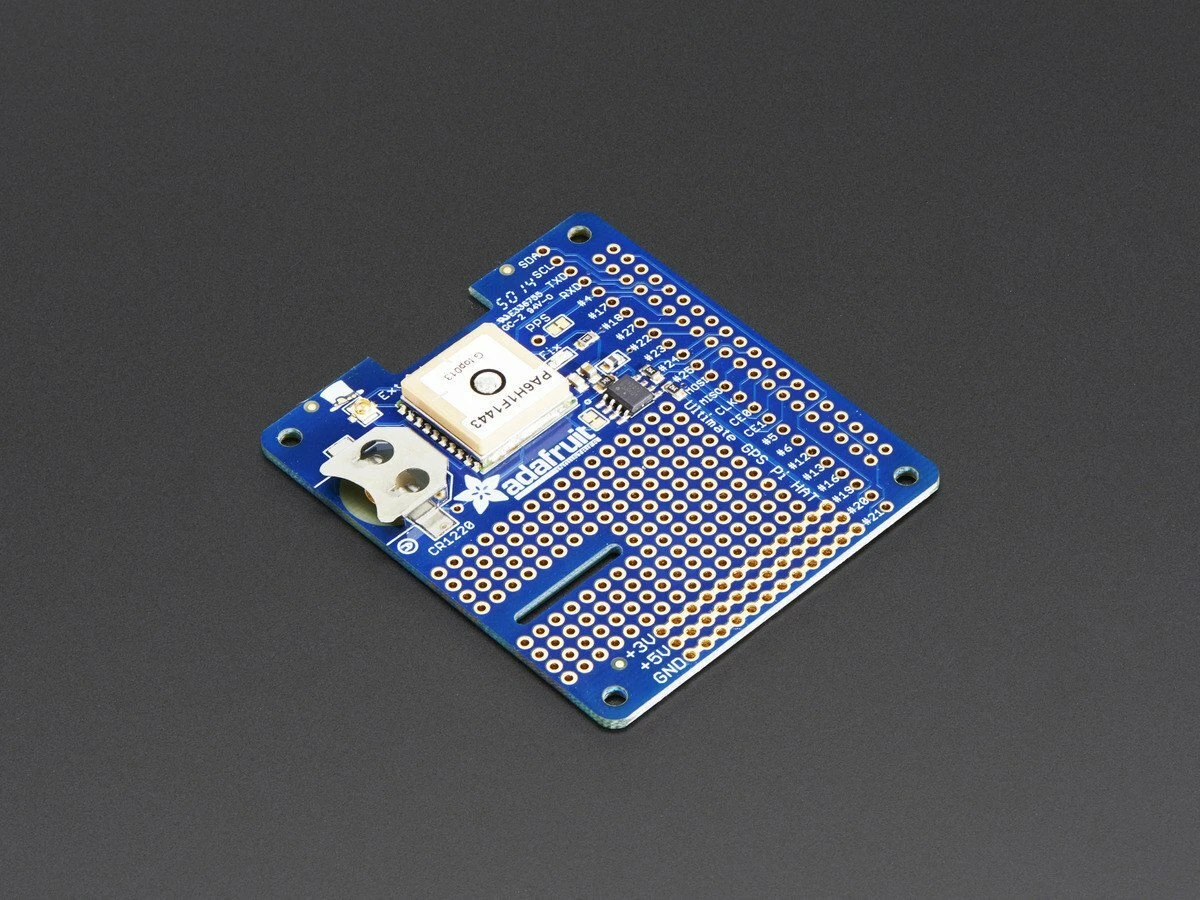
Hace varios meses adquirí un HAT para Raspberry Pi que agrega la opción de un GPS a mi Raspberry, de esta forma puedo tener un servidor de tiempo (NTP) stratum 1 en mi red.

No es sólo el HAT, sino que compré una antena externa para el GPS y un cable para convertir el formato de los conectores:

1- Adafruit Ultimate GPS HAT for Raspberry Pi A+/B+/Pi 2/3/Pi 4 – Mini Kit
2- GPS ANTENNA SMA MALE PLUG ACTIVE ADAPTER CABLE FOR NAVIGATION STEREO SCREEN NEW

3- SMA Female to uFL/u.FL/IPX RF 1.37 Coaxial Cable Adapter Assemb Pick Length (8 inch)
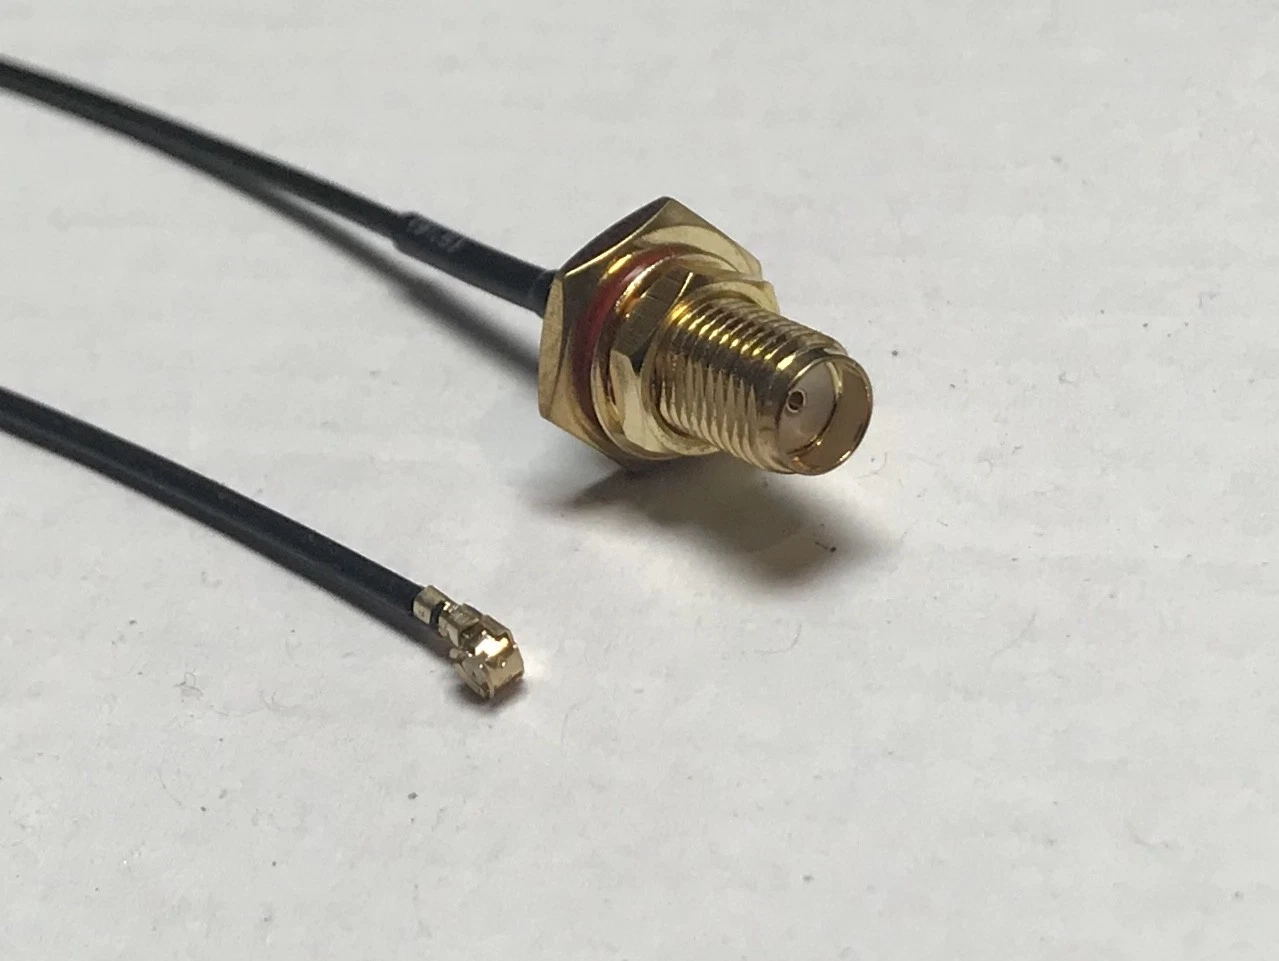
Por supuesto que tanto el HAT como la antena y el convertidor pueden ser de otro fabricante o marca. En mi caso compré este.

Proceso al instalar AlmaLinux:

Una vez tengas instalado AlmaLinux, no olvidar realizar las siguientes configuraciones:

1- Deshabilitar SELinux:

vim /etc/sysconfig/selinux

SELINUX=disabled

2- vim /boot/config.txt

Agregar al final:

# Enable PPS on GPIO 4
dtoverlay=pps-gpio,gpiopin=4

Este paso es fundamental ya que lo que hará es indicarle al raspberry que debe buscar el puerto PPS del GPS en el pin 4, ya que mi HAT envía la señal PPS al pin 4.

Al inicio esto me confundió bastante ya que no me funcionaba el PPS y por tanto mi servicio de gpsd no capturaba los datos del gpsd.

También enfrenté un pequeño problema y es que el raspberry usa el puerto /dev/ttyS0 para su consola serial, y el GPS también lo usa. Entonces lo que hice fue deshabilitar el puerto consola serial. Para ello editas /etc/cmdline.txt y le quitas la parte inicial que dice: console=serial0,115200, dejo el resto igual, por ejemplo:

vim /boot/cmdline.txt
console=console=tty1 root=PARTUUID=530e947f-26ce-402e-8562-a8c34939f03d rootfstype=ext4 rootwait

Instalando gpsd:

dnf install gpsd gpsd-clients

Una vez instalado, edito el archivo de configuración de gpsd dejándolo exactamente así:

/etc/sysconfig/gpsd

# Options for gpsd, including serial devices
OPTIONS="-n /dev/ttyS0"
# Set to 'true' to add USB devices automatically via udev
USBAUTO="true"

El punto es indicarle al servicio de gpsd en qué puerto serial va a encontrar al dispositivo. Esto lo puedes encontrar con:

dmesg -T|egrep tty

por ejemplo en mi caso me decía:

[Sun May 17 22:23:34 2026] fe215040.serial: ttyS0 at MMIO 0xfe215040 (irq = 40, base_baud = 62500000) is a 16550

Configurando chronyd:

Edito /etc/chrony.conf y lo configuro para usar /dev/pps0 de referencia

refclock PPS /dev/pps0 refid PPS precision 1e-7 prefer

server 216.239.35.0 iburst
server 216.239.35.4 iburst
server 216.239.35.8 iburst
server 216.239.35.12 iburst
allow 0.0.0.0/0
allow ::/0
driftfile /var/lib/chrony/drift
rtcsync
makestep 1.0 -1
noclientlog
cmdport 0
minsources 2

Aquí enfrenté un problema y es que /dev/pps0 solo lo puede leer el usuario root, para ello configuré el udev rules para permitir lectura al grupo chrony

echo 'KERNEL=="pps0", OWNER="root", GROUP="chrony", MODE="0660"' > /etc/udev/rules.d/10-pps.rules

Una vez agregado, no olvides reiniciar!

reboot

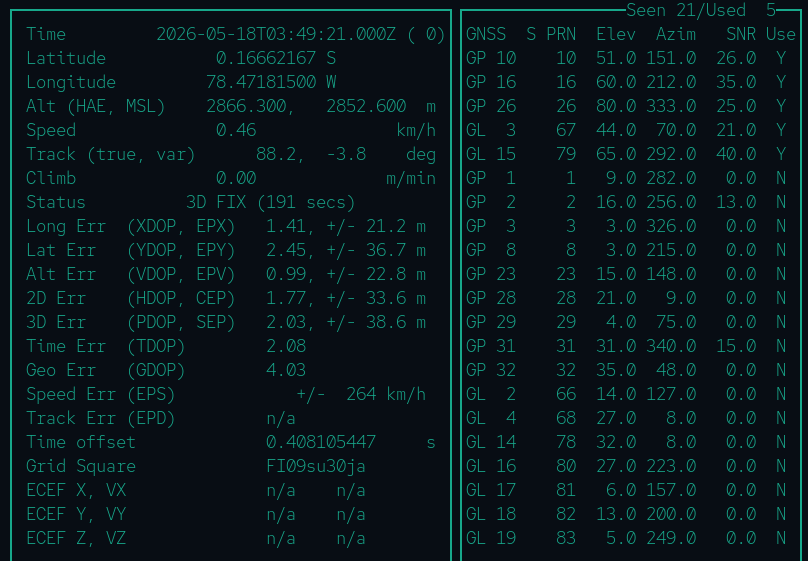
Ahora podemos probar si nuestro chronyd está leyendo bien a través del device pps los impulsos del servicio de gps. Para ello ejecuto:
cgps -s

Y pasados unos segundos (usualmente menos de 15), tu servicio de GPS estará fijado (Fix), míralo en la línea que dice Status 3D FIX
Agregar canon pixma g2100 en Rocky Linux 10

Hace unos 5 años escribí cómo agregar una Canon Pixma G2100 a Debian, esta vez lo necesité hacer para Rocky Linux 10 y fue similar:

Instalamos cupsd:

dnf -y install cups gutenprint gutenprint-cups

Configuramos cupsd para que escuche el mi interfaz de red, y para poder manejar cupsd via web (si queremos). Vamos a cambiar o modificar las siguientes secciones/parámetros. Fundamentalmente es ponerle a escuchar en 0.0.0.0 y Permitir mi red local (Allow from 192.168.1.0/24):

vim /etc/cups/cupsd.conf

Listen 0.0.0.0:631

# Restrict access to the server...
<Location />
  Order allow,deny
  Allow from 192.168.1.0/24
</Location>

# Restrict access to the admin pages...
<Location /admin>
  AuthType Default
  Require user @SYSTEM
  Order allow,deny
  Allow from 192.168.1.0/24
</Location>

# Restrict access to configuration files...
<Location /admin/conf>
  AuthType Default
  Require user @SYSTEM
  Order allow,deny
  Allow from 192.168.1.0/24
</Location>

Arrancamos cupsd:

systemctl enable --now cupsd

Luego entro a 192.168.1.x:631 voy a la interfaz de administración y agrego la impresora. Como instalamos gutenprint, aparecerá Canon en la lista de impresoras. La impresora mía es Canon Pixma G2100 (no Canon G2100).

Create trustedqsl deb from the latest version

apt install libsqlite3-dev libcurl4-openssl-dev fakeroot

wget https://www.arrl.org/tqsl/tqsl-2.7.5.tar.gz
zxf tqsl-2.7.5.tar.gz
cd tqsl-2.7.5/
mkdir debian
cd debian/

vim control

Source: trustedqsl
Section: hamradio
Priority: optional
Maintainer: Your Name [email protected]
Build-Depends: debhelper (>= 10), cmake, libwxgtk3.0-gtk3-dev, libssl-dev, libdb-dev
Standards-Version: 4.1.1

Package: trustedqsl
Architecture: any
Depends: ${shlibs:Depends}, ${misc:Depends}
Description: TrustedQSL for digital QSL cards

vim rules

#!/usr/bin/make -f

%:
dh $@

chmod +x rules

vim changelog

trustedqsl (2.6.5-1) unstable; urgency=medium

  • Initial release for aarch64 architecture. -- Ernesto Perez [email protected] Mon, 06 Jan 2025 10:00:00 +0000

vim compat
10

cd ..
mkdir build
cd build/
cmake ..
make -j$(nproc)
cd ..
dpkg-buildpackage -us -uc -b

ls ../*deb

sudo dpkg -i ../trustedqsl*.deb

Agregar HP Laserjet m175A en debian buster

  1. Instalar cupsd
    1. sudo apt install cups cups-client cups-filters cups-ipp-utils
  2. Configurar cupsd para que escuche desde 0.0.0.0
    1. cupsctl –remote-admin –remote-any –share-printers
  3. Instalar drivers para pixma
    1. apt -y install hp-ppd hplip
  4. Acceder a cupsd desde el browser: https://laip:631
  5. Agregar nueva impresora
  6. Buscar en la lista de drivers HP y la versión de pixma que tengamos
    1. buscar lentamente hp laserjet color pro m175a, está desordenado. La m176n me funciona bien, pues no me apareció la m175a

Agregar canon pixma g2100 en debian buster

  1. Instalar cupsd
    1. sudo apt install cups cups-client cups-filters cups-ipp-utils
  2. Configurar cupsd para que escuche desde 0.0.0.0
    1. cupsctl –remote-admin –remote-any –share-printers
  3. Instalar drivers para pixma
    1. sudo apt install printer-driver-gutenprint
  4. Acceder a cupsd desde el browser: https://laip:631
  5. Agregar nueva impresora
  6. Buscar en la lista de drivers CANON y la versión de pixma que tengamos

Compiling WSJT-X for armbian

This small tutorial will show you how to build and install wsjt-x for your ARMBIAN. In my case I have an OrangePI PC board and armbian buster desktop. But this tuto should work for any other board. It should also work for any other Linux and architecture. E.g.: raspios, debian, ubuntu, etc.

I followed this tutorial for Linux Mint:

http://kb4lhp.blogspot.com/2018/12/recipe-for-building-and-installing-new.html

Lets start by installing some requirements:

sudo apt-get install build-essential checkinstall texinfo gfortran libfftw3-dev libboost-log1.74 libboost-log qttools5-dev qttools5-dev-tools libqt5svg5-dev qtmultimedia5-dev asciidoctor libqt5serialport5-dev libqt5multimedia5 docbook-xsl xsltproc libxml2-utils dpkg cmake libusb-dev libusb-1.0 libudev-dev

Then download the latest tgz from https://physics.princeton.edu/pulsar/K1JT/wsjtx.html ex;

wget https://physics.princeton.edu/pulsar/K1JT/wsjtx-2.2.2.tgz 

Lets extract the contents of this package and cd into the directory:

tar zxf wsjtx-2.2.2.tgz
cd wsjtx-2.2.2

And then, lets configure and build wsjtx:

cmake -DWSJT_SKIP_MANPAGES=ON -DWSJT_GENERATE_DOCS=OFF .
cmake --build .

This process will take time depending on how fast is your CPU. After it finished, we will invoke the next command in order for it to build the .deb package. Pay attention you will have to modify option number 10:

sudo checkinstall

Don’t create documentation (n)

This package will be built according to these values: 

0 -  Maintainer: [ [email protected] ]
1 -  Summary: [ WSJT-X version 2.2.2 compiled by HC6PE ]
2 -  Name:    [ wsjtx ]
3 -  Version: [ 2.2.2 ]
4 -  Release: [ 1 ]
5 -  License: [ GPL ]
6 -  Group:   [ checkinstall ]
7 -  Architecture: [ armhf ]
8 -  Source location: [ wsjtx-2.2.2 ]
9 -  Alternate source location: [  ]
10 - Requires: [ libqt5multimedia5 ]
11 - Provides: [ wsjtx ]
12 - Conflicts: [  ]
13 - Replaces: [  ]
Enter a number to change any of them or press ENTER to continue: 

in here you enter “10” and add “libqt5multimedia5” (without the quotes). Then just continue and it will build the .deb.

Exclude any missing file from package.


Done. The new package has been installed and saved to
/home/radio/wsjtx-2.2.2/wsjtx_2.2.2-1_armhf.deb

Lets install it!

radio@pisdr:~$ sudo dpkg -i ~/wsjtx-2.2.2/wsjtx_2.2.2-1_armhf.deb
(Reading database … 112570 files and directories currently installed.)
Preparing to unpack …/wsjtx_2.2.2-1_armhf.deb …
Unpacking wsjtx (2.2.2-1) over (2.2.2-1) …
Setting up wsjtx (2.2.2-1) …
Processing triggers for man-db (2.7.5-1) …

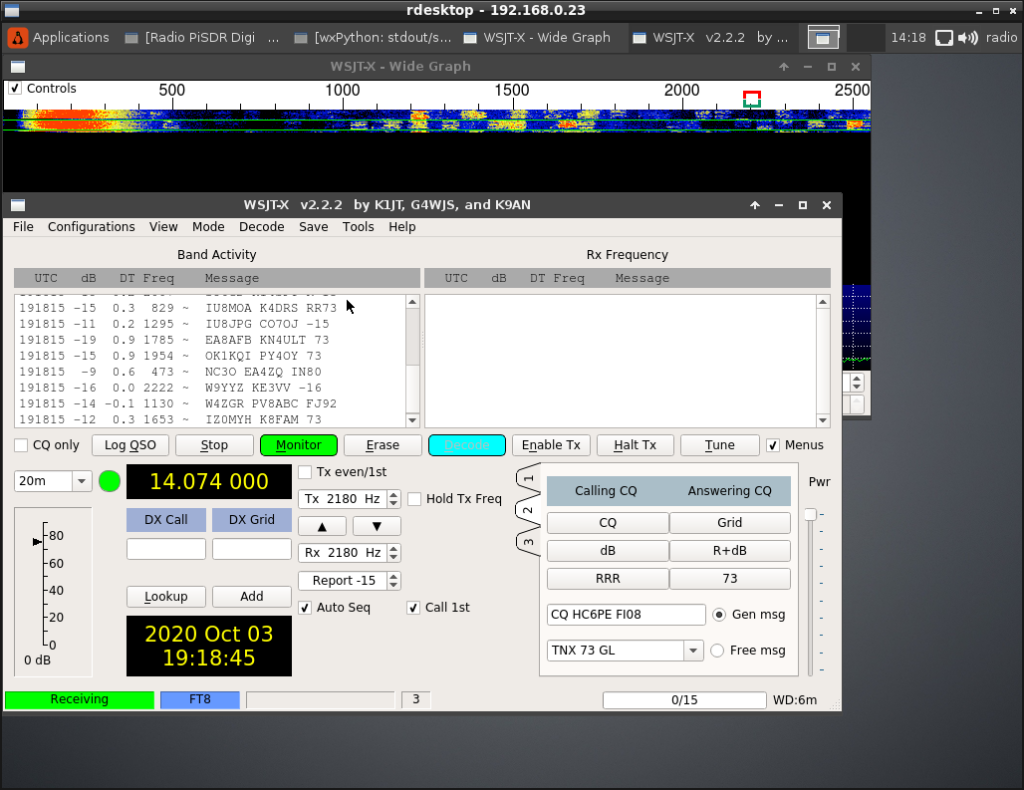
And… it works! Check the version, in my case it is 2.2.2, the same I compiled and installed.